Story planning
AI Storyboard Frame Prompts for Readable Shots
Write storyboard prompts around shot size, camera position and a single action. Includes three complete frames, continuity checks and practical correction steps.
By Onhand Studio · September 16, 2026 · 4 min read
Give each frame one job
A storyboard frame should make a shot understandable: where the camera is, what is visible and what action matters at that moment. It does not need finished-film detail. Begin by writing the action in one sentence, then choose the shot size that shows it clearly. A wide shot can establish a room; a close-up can explain a hand reaching for a particular object.
Generate one frame at a time when you need to inspect staging carefully. Asking for a complete multi-panel sequence can introduce inconsistent characters, missing panels and unreadable annotations. The prompts below are untested starting briefs for a simple scene: a courier enters a workshop, notices an envelope and picks it up.
Write continuity facts outside the prompt
Make a short reference note before generating: the courier wears a plain dark jacket, the envelope is pale cream, the worktable sits on the right and the door is at the back left. Repeat the relevant details in each frame prompt. Text repetition can reduce ambiguity, but it does not guarantee the same face, clothing or geometry across generated images.
- Record camera position and shot size for each frame.
- Keep left-right geography explicit where it affects the cut.
- Describe one visible moment rather than a sequence of actions.
- Add frame numbers, dialogue and movement arrows separately after generation.
Frame one: establish the room and destination
Starting prompt: wide establishing shot
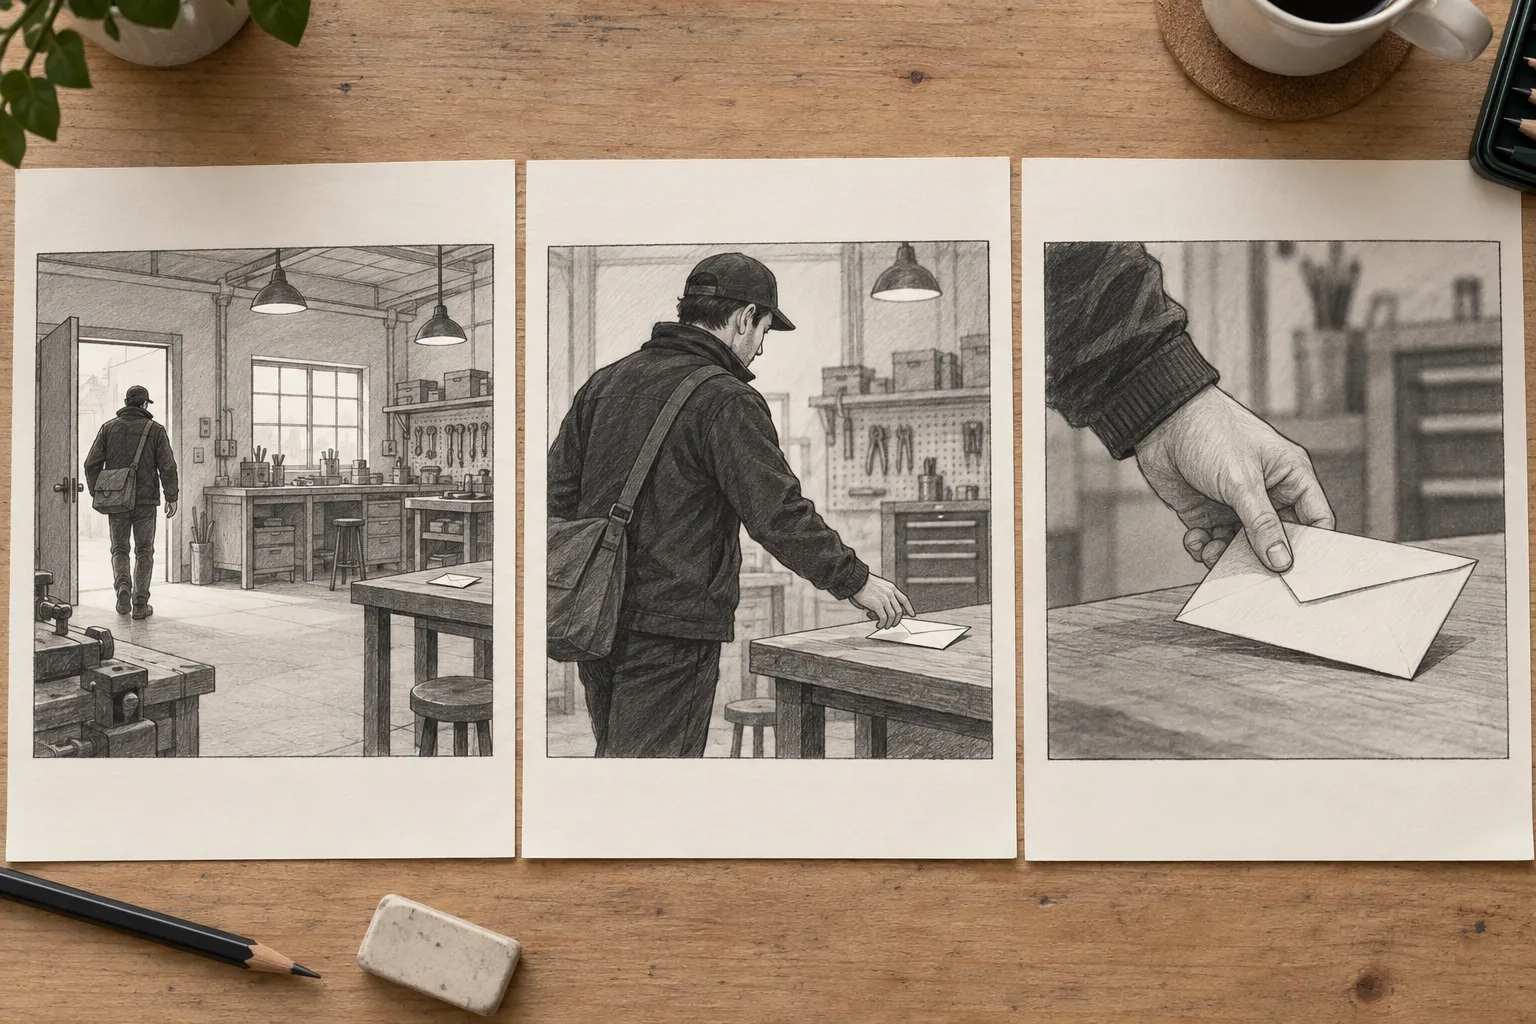
Wide grayscale storyboard, eye-level from front left of workshop. Dark-jacketed courier enters back-left door, looking toward pale envelope near front edge of right worktable. Pencil drawing, clear silhouettes, simple shading.
The wide frame introduces the door, person and table together. The envelope needs enough contrast to register, but it should not become unnaturally huge. If its identity matters more than the room layout, plan a separate insert shot rather than trying to make one wide frame explain every detail.
Two useful follow-up shot directions
Variant: medium approach shot
Grayscale storyboard, medium side view at eye level. Courier in dark jacket left of worktable, right hand reaching toward pale envelope on right. Gap between hand and envelope, clear pose, pencil drawing.
Variant: close-up insert
Grayscale storyboard close-up, right hand entering from left lifts pale envelope at right-center. Dark jacket sleeve, wooden table edge visible, clear finger placement, pencil drawing, distinct outlines, minimal background.
These frames answer different questions: the medium shot explains who acts, while the close-up explains the object interaction. They are alternatives or sequence components, depending on the edit. Keep shot decisions intentional; a close-up added only because it looks cinematic can slow a scene that already communicates clearly.
Correct staging and continuity before appearance
If the courier looks away from the envelope, state the eyeline more explicitly or choose a clearer pose. If the hand enters from the wrong side, correct that direction before generating more frames. If the table moves between shots, use the written room plan to decide which frame to revise. Do not let accidental generated geography determine the scene’s blocking.
Hand-object contact often needs close inspection. For a planning board, a rough but unambiguous hand can be more useful than a detailed impossible grip. Simplify the drawing style and remove extra objects if the intended action is obscured. If consistent identity is essential, use suitable reference material in a workflow that supports it, then still review each output.
Read the frames in sequence
Arrange the candidate frames in order with plain captions describing the action and camera choice. Read them without explaining the scene aloud. Check whether the envelope stays on the same side, whether the courier’s approach is understandable and whether the close-up connects to the preceding movement. A storyboard is doing its job when the sequence can be discussed concretely.
Add movement arrows and dialogue in the layout, where you can control their direction and wording. Label frames that are alternatives so they are not mistaken for additional shots. Keep the camera notes and continuity list with the board. Before production, translate any pleasing but impractical generated camera position into a setup that the actual location and crew can achieve.